
Your Cart is Empty

Dear WarStages Backer,
The Pledge Manager is about to open and meanwhile, we have a few other things to talk to you about, so without further ado, let’s just jump in!
If you backed WarStages at Small Cathedral level or higher DURING our Kickstarter campaign, you received an email from us to download our first special gift for you: PDF files for containers. Have you had a chance to give them try?
Our own Claudia certainly did, and she came up with great upgrades in the way to use them, showing us that this product is even better than what we’d anticipated!
What she did was to try different types of cardboard and foam. She built her first set of containers with regular cardboard. But then she tried black foamcore, and the thickness and robustness of it allowed her to to build a structure with a lid-like roof that will make things even better in game for obvious reasons.
You can see the awesome result she got in the video below.
If for any reason, you did not download the PDF files for the Containers and/or the link your got has now expired, no worries. We’ll include it along with the new link for the Cistern files coming to you via private KS message tomorrow if you're eligible for those PDF rewards (you must have backed during the KS campaign at Small Cathedral level or above). And if you also missed the assembly video, here it is again:
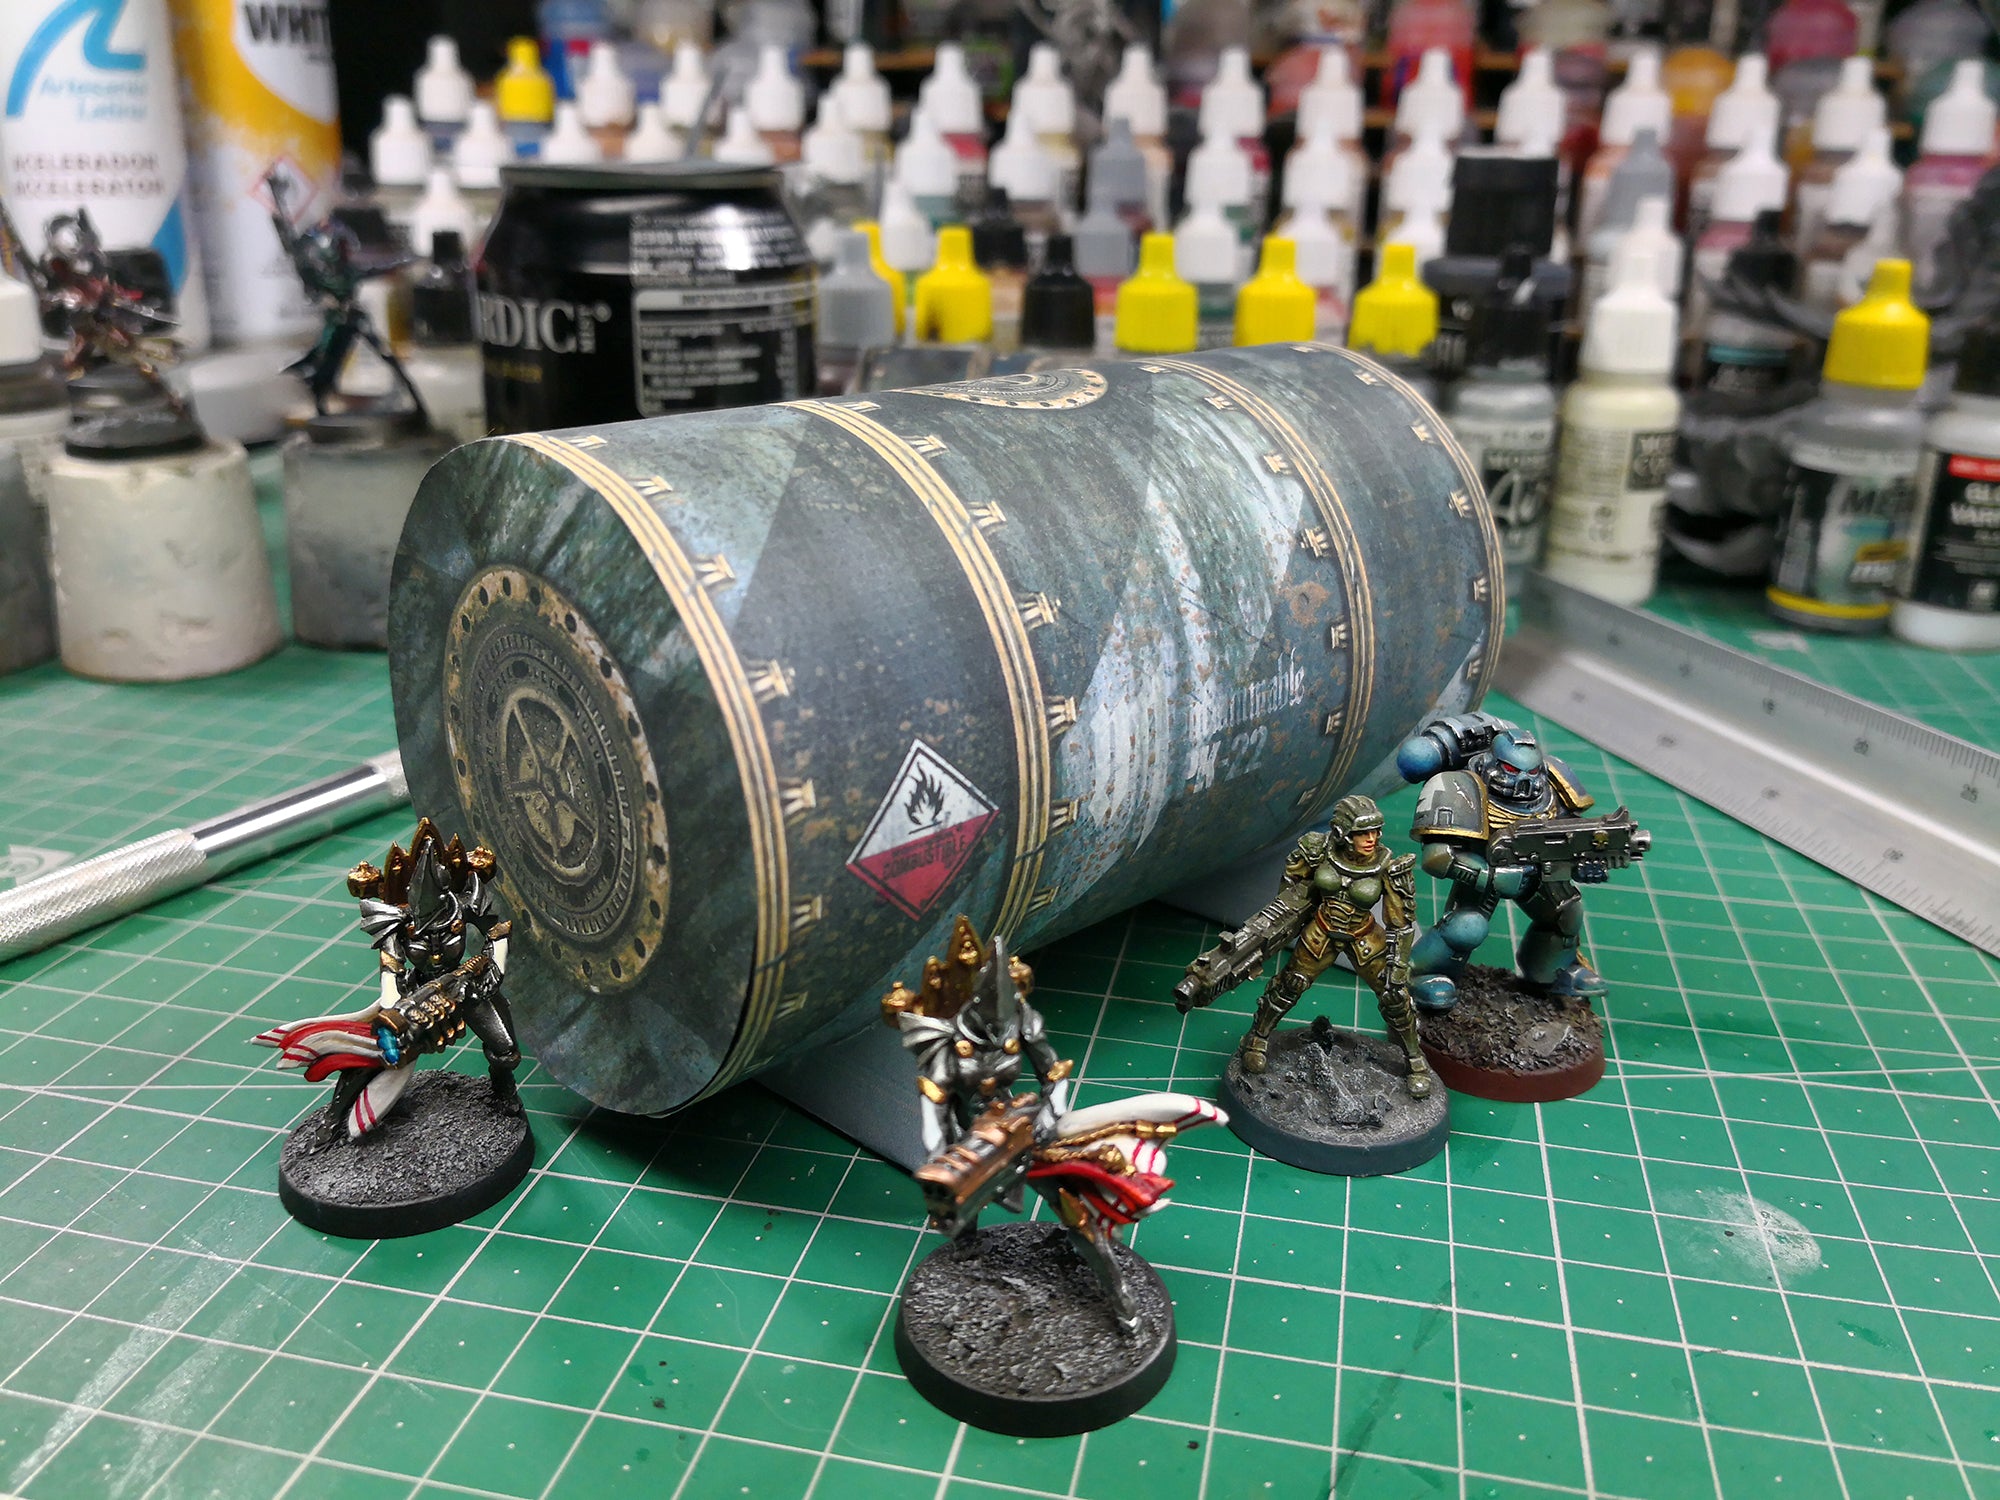
So with these great results with the containers, we have been very excited to make the cistern system ready for you. Just as a reminder, the cistern PDF will provide you with a set of “wraps” that you can wrap around different sizes of soda cans or cardboard tubes.
We’ve known from the start that soda cans may have different sizes around the world, but when we really started digging, we discovered an unexpected world of shapes and sizes way beyond what we had envisioned based on our original observations.
The fact is that the world of soda cans is huge!
And even your "regular" can of Coke, the one that you would deem “standard”, has a different size in nearly every country in the world! And then, when you start exploring alternative formats like “slim” or “extra small”, things get quite complicated...
We found this image on the website of a Coke cans collector...

If you are curious about this, you can learn more.... it's crazy!
After trying various approaches, we came to the conclusion that the best way to deal with this was to make the Wraps always larger than what was needed so that you can trim them to your specific needs. This means that you will have to do some measuring on your end but you'll be able to fit the Wraps on a soda can wherever you live in the world - which is a pretty cool thing :)

However, it also means that you will have to make a few measurements and tests to print and cut the parts designed to cover the top and bottom of your can, as well as the cradle on which the cisterns will stand.

We recommend that you first do a few tests with your own printer (set in low-quality to save ink) to resize the print files based on your needs. Then, once everything is fine, save a copy of the resized file and have it printed in high quality.

Here is a detailed step by step on how to do this:
You can use the same technique to print to top and bottom of the can. This time you will measure the diameter of the can and compare it to the diameter of the Cistern Top and Bottom print.

For the base, you should use the same % you used for Top and Bottom. But you might want to test that to be sure you get the right result.
Once everything is printed, you simply have to glue the various parts to the soda can, starting by the wrapper, then adding the top and bottom and then the base.

Once again, please note that you'll receive the cisterns' files tomorrow in a private Kickstarter message
As part of our planning, we are making tests with plain white cardboard to laser-cut new versions of several of the original parts, together with the ones that that we tweaked along the way. We also made a few additional specific parts for the larger cathedral kits to better assemble them.
However, our laser-cutting guy didn't have the exact cardboard thickness needed to work with our original clips. He could re-order some cardboard for us, but that would have taken forever (yep, sometimes, things just don't make sense...).
So we approached the problem the other way around and decided to print some new clips adapted to the available cardboard thickness. Thank God for 3D printing!

White cardboard parts waiting for their new clips
So we’re happily printing away, and therefore still need a few more days before being able to finish the assembly of these new tests.
The Pledge Manager is about to open! Yeah!
In fact it has been pretty much ready for a few days now, but opening the Pledge Manager is something that needs our undivided attention at the beginning, since that is when the bulk of you guys show up. We want to be able to be there for you, answer your questions, and help along the way. So we prefer to delay the opening a bit and schedule a few days during which we know nothing else will require our attention.
Link and instructions coming up later this week.
In our previous installment of the Making Of WarStages, we explained how we decided to move the project to ultra-strong game board instead of plastic. At the time it was a tough decision, but we don't regret it one bit! This kind of board has proved to be a fantastic material for many reasons. One of them is the ease of prototyping, manufacturing, and printing small runs.
The other is the quality of the visuals and textures we can produce without you having to paint anything. The more we work on this, the more we think it is awesome. As we are currently designing some KST and Iron Empire environment for the TGG game, we keep on being amazed by what is achievable. The TGG game table will sure look pretty awesome right out of the box!
So how are these textures created?
Based on Gérard Trignac's concept drawings and on many, many photos gathered from around the web, we started to build the main blocks of the Cathedral in 3D.
We had to modify all of the references to make them work with the constraints of the 30mm scale as well as the technical restrictions of manufacturing.
For example, we would have like to make more elaborate gothic windows, with more complex tracery, but to cut cardboard after printing, you need to make die cuts blades, that is, made-to-shape cutting blades that will punch through cardboard. These die cuts blades can have fairly complex shapes, but when we approached printers with our original designs, they looked at us like if we were completely insane. We were definitely way over-the-top for them and for the blade makers (as these blades are actually built by hand).
Here is a first version of the cathedral main door based on Gérard's drawing and on the Strasbourg's cathedral.
Its proportions were slightly altered and ornaments were added in the final version.

Here is also a version of a full 3D section that was originally conceived for plastic production. You can see that the windows have a slightly more complex tracery pattern.

As you can see on these images, each detail of the textures were first modeled in 3D! Once that was done, we did some renders of each side of each elements and we projected these images on flat, cardboard-like surfaces.
This way we ended up with a version of the cathedral in “flat 3D” very close to the final cardboard model.
The first version of the “flat 3D” had more complex and thick buttresses, but it proved to require nearly 3 times more cardboard that the flat version we did in the end. That would have made the price of the kits skyrocket, so we had to regretfully walk away from that design.

The original project was to have the cathedral made on a black matte cardboard with embossed gold foil for all the gold ornaments. Once again, the tests looked breathtaking but the prices were out of this world! These types of finish are mostly used only for high-end luxury packaging and, well, there is a reason for that...
Once we had the whole cathedral modeled that way, we brought everything in Photoshop and enhanced the textures with a lot of various effects. The mix between the volumes of the 3D renders and the photographic / painted texturing gave an extremely rich and beautiful finish.
We did the same work with the furniture, modeling them in detailed 3D, flattening them out, and enhancing their texture in Photoshop.

Some of the Cathedral furniture modelled in 3D

The 3D models with a first layer of textures applied

And then the basic textured enhanced in Photoshop
But we were not done yet!
It was now time to virtually assemble the various kits and find the best possible composition. So we applied our photoshopped textures to our “flat 3D” models and brought everything back into Unreal, the video game engine. Suddenly, we could visit our Cathedral just like in a video game...
Stay tuned for Part 4...
The files are now ready for manufacturing, the white cardboard tests will be finished in the next two weeks and during that time you will make your selection in the pledge manager. This means that it will be time to launch the manufacturing. So as soon as the printer confirms a slot for us in his schedule, the manufacturing will start. We will let you know about this calendar as soon as we have a confirmation, once the Pledge manager has been completed.
We are also about to launch the TGG Game and Background website, with information on the Game, the TGG universe and lots of other tasty stuff. This will be the main destination to learn about the fluff of the characters and the game. At first it will be quite simple, but it will continue to grow non-stop as we ramp up for the next Kickstarter. Among other things, it will show you how to use your WarStages Cathedral with our game and, in a few weeks, you’ll discover the new environments we are currently designing as a new WarStages project for the game.
You will find this website at www.TGGtheGame.com
For now it's still a placeholder, but the first version will be live soon.

Comments will be approved before showing up.


Add minis to your cart - watch the discounts grow - Up to 60% OFF!


Charles
April 18, 2018
I never received the round container files? I only got the triangular ones.