
Your Cart is Empty
The various elements that make up Syl-Iriah are easily assembled, be it the Legendary or the
Heroic version. We have ensured that all the pieces fit together easily and sturdily. Read on
for detailed instructions.
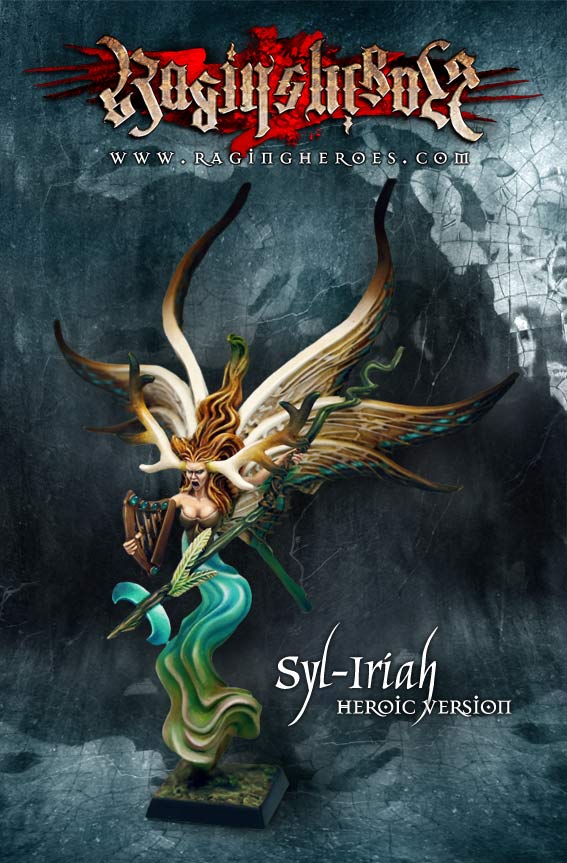
Heroic Syl-Iriah as painted by Thomas DAVID.
Before you begin putting Syl-Iriah together, we suggest that you first take a moment to look at
all the various elements and to first test the assembly of your mini without using glue.

You will notice that the wings have small locators that allow for a very precise and sturdy assembly.
They virtually act as pinning! (These locators are not shown on the photos posted here, as we
prepared this article with a prototype cast that did not yet have them.)
Before beginning to assemble Syl-Iriah, if you wish Syl-Iriah's wings to be curved as they are on
our website, you will need to gently bend them by hand. For technical reasons, the wings must
indeed be moulded relatively flat. You may prefer to keep their original shape and mount them as is,
this is not problem. But your miniature may lose some of her elegance.
Before you start to bend the wings, you need to properly identify the Left and Right elements.
Syl-Iriah's wings are made of four elements:
- Two pieces, right and left, each made up of three wings. We shall call them the Lower Right Wings
and the Lower Left Wings. They are easily recognizable as they each have a little "tail" at the bottom.
- The other two pieces are the Top Right Wing and the Top Left Wing.

Whenever we talk of right and left, we mean Syl-Iriah's right and Syl-Iriah's left.
It is easy to differentiate between the Lower Right Wings and the Lower Left Wings. When you place
either on the torso, the lowest wing (the one with the tail) must be on the inside of the miniature.
And so, when you look at the miniature from the outside, in a profile view, the wing that is just above
it partially covers the lowest one.

It is a little trickier to differentiate between the Top Right Wing and the Top Left Wing. To do this, look
for the small notches and cuts at the base of the wings that will fit against Syl-Iriah's hair. Obviously,
these notches must be positioned on the inside face of the wings. Overall you will note that the notches
are stronger on the Top Left Wing. The outside of the wings is smooth, as shown in the image below below.

You will also notice that the base of the Top Left Wing is longer that the base of the Top Right Wing.

In any case, do make absolutely sure that you have fully identified the right and left wings BEFORE
starting to bend them.
To give the wings their shape, begin by gently curving the two upper wings. To bend metal while
avoiding damage, do make sure that you press the wings on the widest possible surface along
your thumbs. Press lightly, smoothly, and steadily. The metal will bend quite easily.

You may feel under your fingers some small light cracking that can sometimes be nerve-racking,
but there is nothing to fear. These cracks are quite normal, they are due to the metal alloy's inner structure. If you
proceed slowly and gently, you will have no problem.
After bending the first Top Wing, properly line it up with the other Top Wing to determine where
you must apply pressure on the second wing to get a curvature that is symmetrical to the first
wing. Bend the second wing by checking regularly that the curvature of the Left Wing matches
that of the Right Wing.

Moving on to the Lower Wings.
Take the Lower Right Wings element and position it against the Top Right Wing you've just curved.
The two curvatures must overlap.

Proceed in the same manner for the left side and, once more, make sure that the Lower Right and
the Lower Left Wings elements have a symmetrical curvature.

Once you've shaped the wings, you've done most of the work.
Now, assemble the Torso and the Skirt of Syl-Iriah.
If you own Legendary Syl-Iriah, you will first need to assemble the two halves of the skirt. This is
very easy to do thanks to the locators put in for that purpose.
If you plan to handle your miniature quite often, for example because you play with, you can pin
the Torso and the Skirt for added strength.
Rather than gluing the Torso and the Skirt with a cyanolit-type glue (such as SuperGlue), you may
prefer to use a two-component resin adhesive (Araldite type). It is a little trickier to use but will
make for a stronger bond.
Now glue the Base to Syl-Iriah's Skirt.
Now that the body is in place, you can glue the Wings using cyanolit glue. But first, test the
assembly one last time to ensure that you are correctly positioning everything.
Then, first glue the two Lower Right and Left elements, and then both Top Wings.
Now glue the weapons and accessories of your choice to the Right and the Left Arms.
If you use the Lance or the Magic Staff for the Left Arm, we recommend that you place the
top end against Syl-Iriah's wing and apply a drop of glue at the point where they meet to make
the miniature sturdier.
All that's left is gluing Syl-Iriah's Antlers to her temples.
You will note that given the design of this mini, they are entirely optional. You can easily mask
their absence at the painting stage.
You're done! You only need to paint it. For inspiration, see above what Thomas David has done
for Heroic Syl-Iriah.
Offering many accessories is a huge benefit in terms of customization our minis, but it makes
hem more fragile when they need to travel. This is even more so in the case of relatively large
pieces such as Syl- Iriah.
To transport them more easily, you can proceed as follows:
- On the Web, you can find many shops that sell small powerful magnets (called Rare Earth Magnet).
- Attach one or more of these magnets to the base of your mini.
- Then, find a box or a container that can easily hold your mini. An empty jam jar is perfect for
Syl-Iriah Heroic. But you will likely need something bigger for Syl-Iriah Legendary, such as a small
shoebox, an (empty!) 1-liter paint pot paint, etc.
- If you use a pot with a metal lid, magnet Syl-Iriah to the lid, which will then becomes the base
of your travel box.
- If you use a cardboard or light wooden box, glue a small metal plate at the bottom of the box
to ensure that Syl-Iriah remains stationary during transport.
- By proceeding this way, you are virtually certain to not spoil your miniature.