
Your Cart is Empty
The mini of Moloss and Minion includes many pieces, some quite small. So we thought
a little step-by-step workflow might help you in assembling it.
0
Here are all parts of the mini in 54mm. Note that the 28mm version has a standard base
as well as an additional piece as one of Moloss' tusks is separate from his head.

1
Having trimmed and cleaned each element, start by assembling the two parts of Moloss' body.
Use the straps of his harness as a guide to properly align the two halves.
With a cutter or a file, slightly pare down the base of the head so that it fits well
between the shoulders, then glue.
For the 28mm version, you must glue one of Moloss' tusk to his head. You can do this now.

2
The piece that connects the two hands with a chain is quite fragile. Be careful when handling it.
It is possible that the dowel protruding from each hand is slightly too large to fit
completely into the wrists. With a file or a cutter, pare it down until the piece
fits correctly, then glue.

3
It's Minion's turn. You may have to use your cutter to easily clean the inside of the
saddle base if some residues are obstructing the slot. Before gluing, make sure the saddle
fits well on its base. If necessary, sand down the base a bit.
Now that Minion is in place, you can glue his arms in the same way as Moloss' hands.

4
Gluing Minion's claws will require some care, especially for the 28mm. To ensure that they
are properly positioned, you first need to glue the two drums.
Refer to the pictures and images on the website to determine their correct positioning.
5
The claws are the most difficult elements to position. For the 28mm version, you might want
to work with tweezers. First, prepare the two lower claws by testing their nesting in the holes
located on Moloss' back. The right and left lower claws are pretty much interchangeable,
just position them in the hole they best fit in. If necessary, use a cutter to slightly trim
the tip of the claws. Do not glue until you have tested both claws.

6
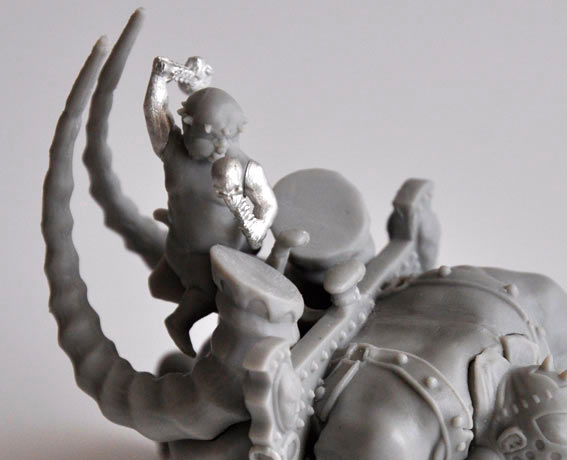
Do the same for the two upper claws. This time, take note: the longest claw must be
on the right side of Minion.

7
For the 54mm version, you can now place the mini on its base. Use the photo below to orient
the base correctly for the mini. And you're done! Happy painting!
